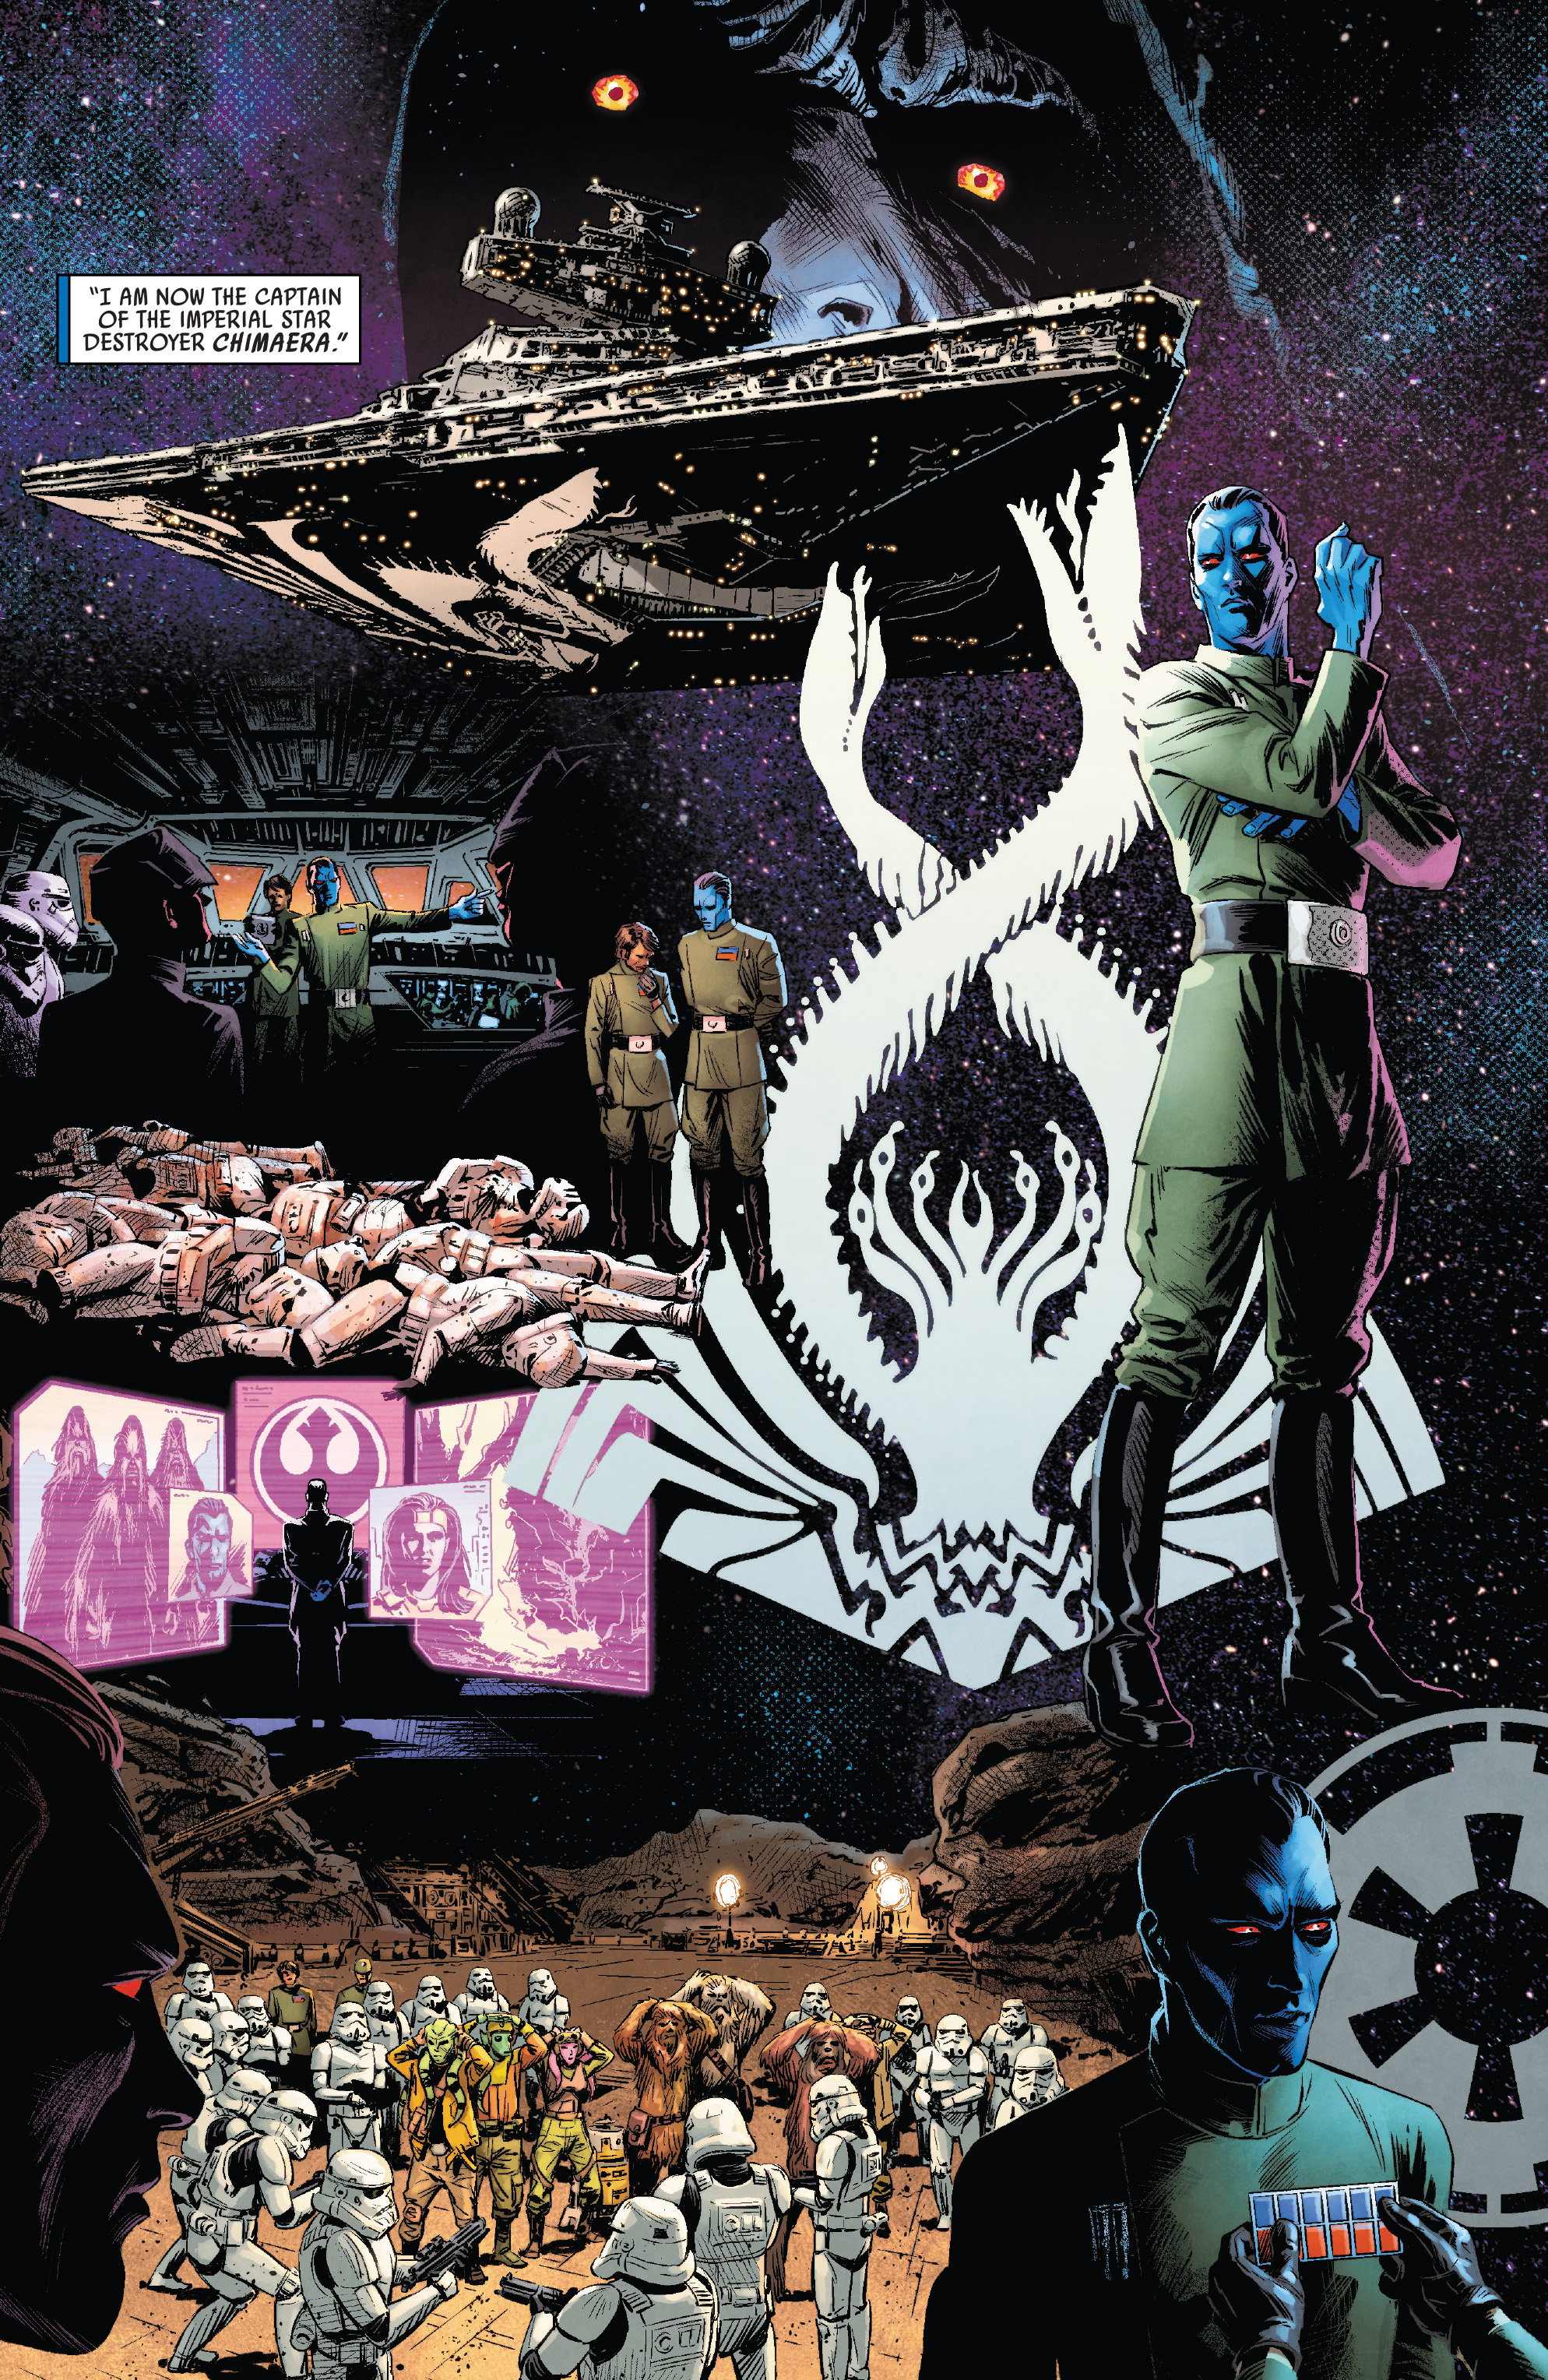
The Chimaera (with a pronunciation of /kaɪˈmɪərə/) was an Imperial I-class Star Destroyer that had undergone modifications, and was commanded by Imperial officer Thrawn during the Galactic Civil War. As he advanced to the ranks of commodore and subsequently admiral within the 96th Task Force, it functioned as his flagship. Following his promotion to Grand Admiral, command was transferred alongside him from the task force to the flagship of the Seventh Fleet. During the events of the Liberation of Lothal, purrgil, which had been summoned by the young rebel Padawan Ezra Bridger, pulled the Chimaera into hyperspace, with Thrawn, Bridger, and the majority of the crew still on board.
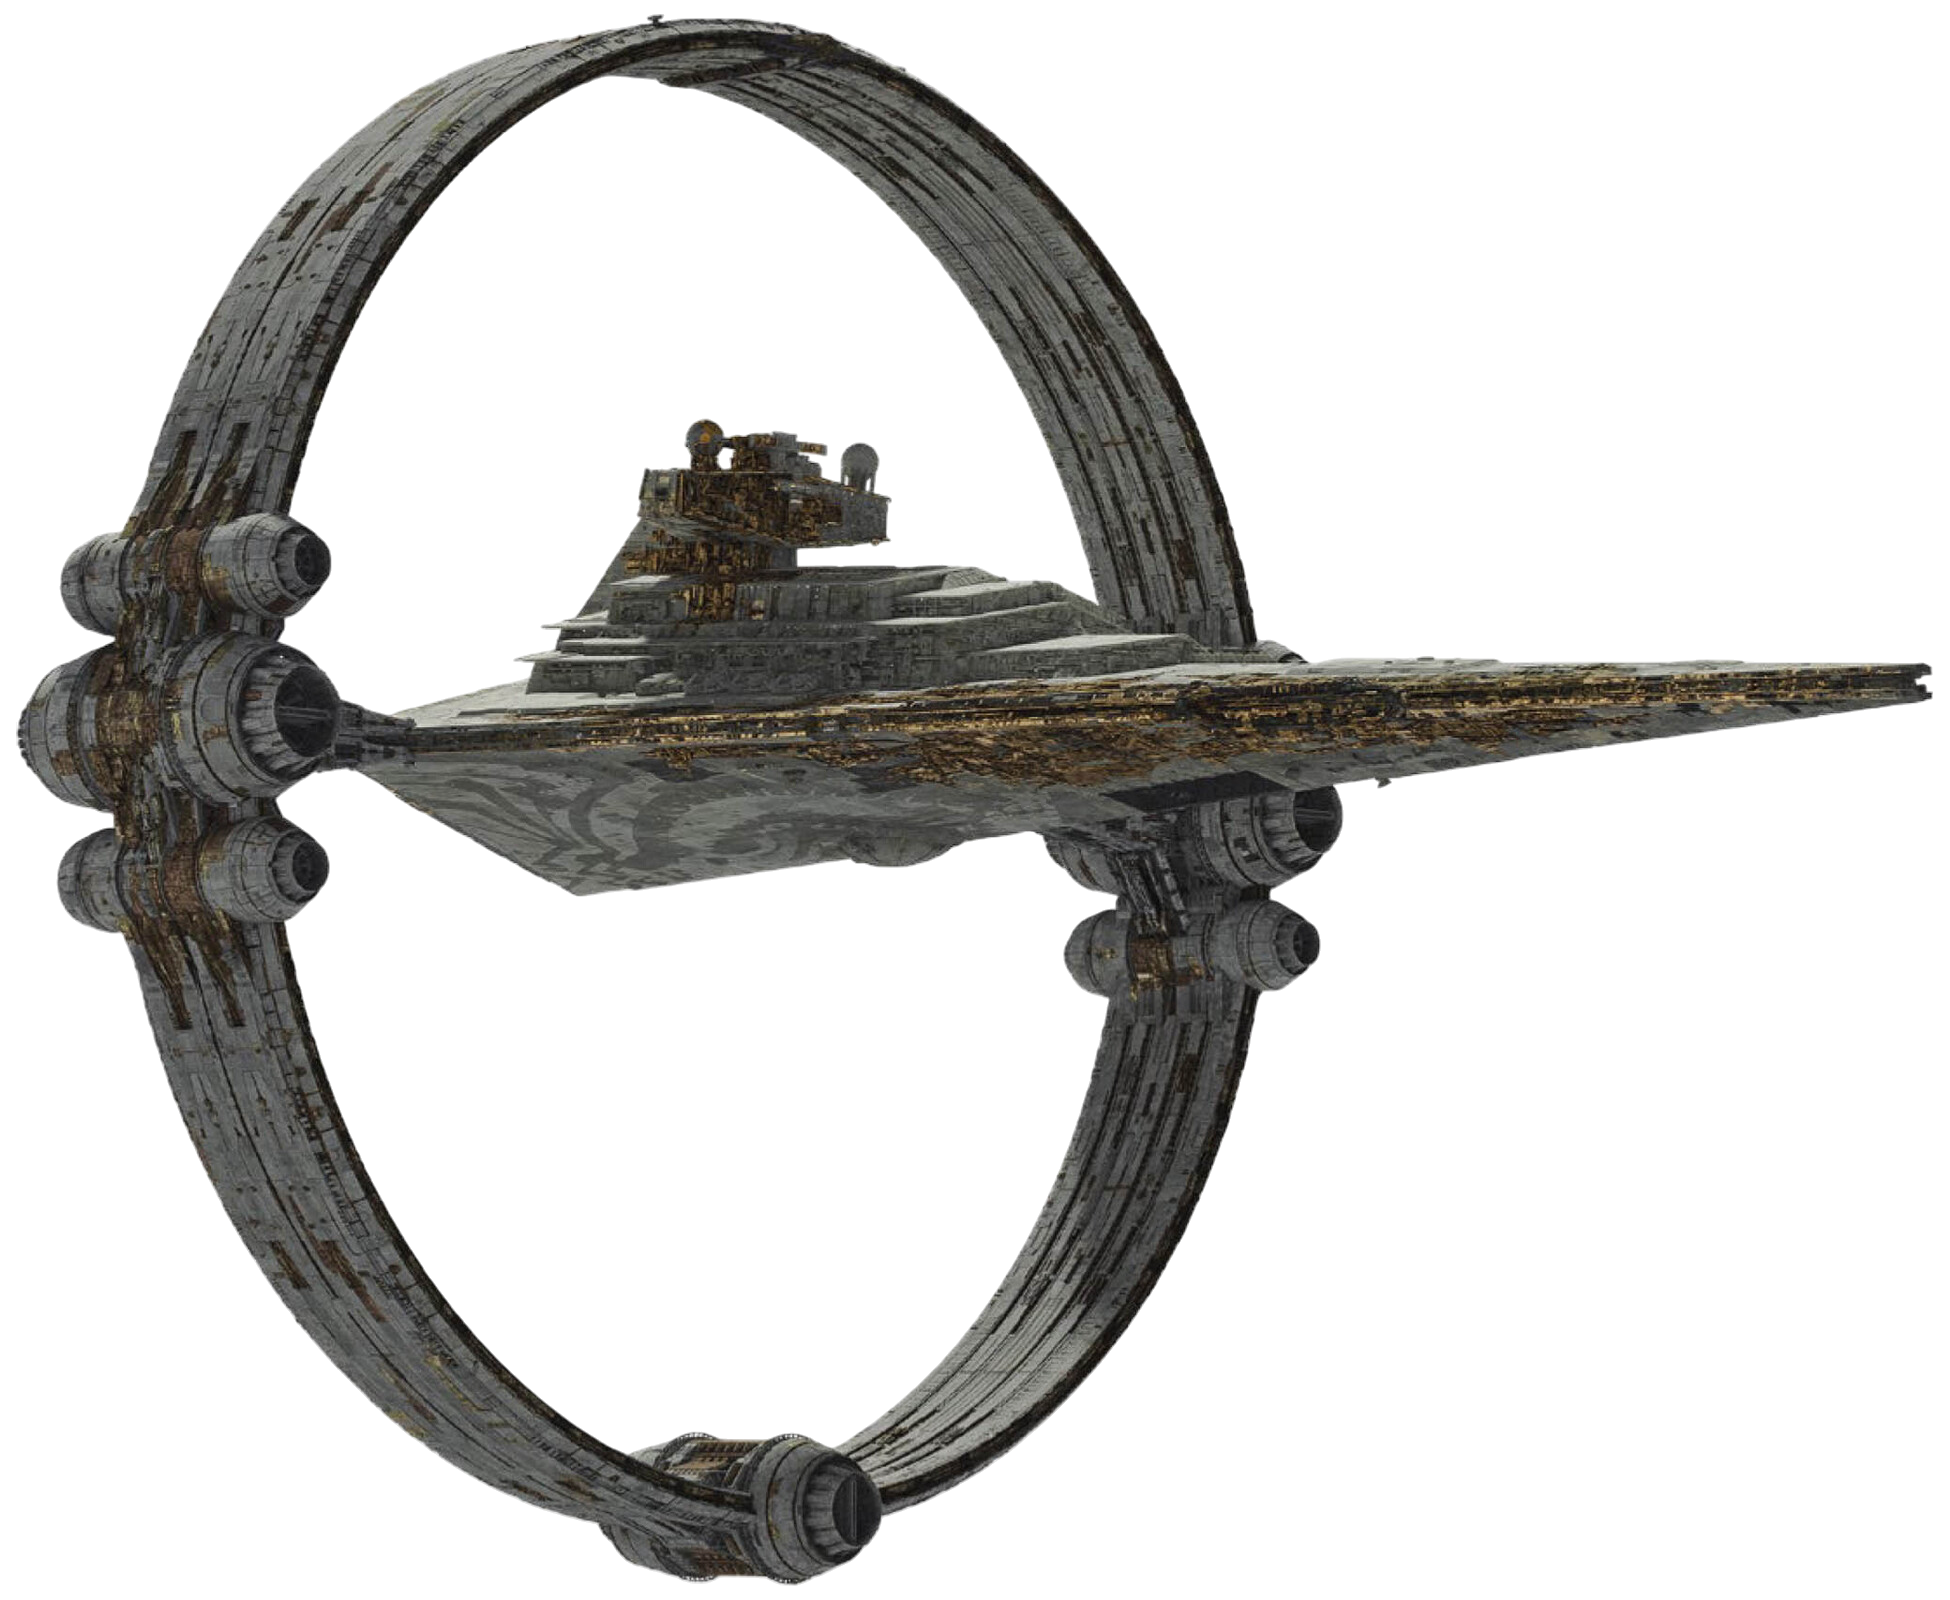
The Chimaera made its way to a far galaxy and came to rest on Peridea, where it remained for a number of years. When Imperial Remnant forces arrived, led by the witch Morgan Elsbeth, the Chimaera journeyed back to the galaxy and was docked to the Eye of Sion, a gigantic hyperspace transport ring located beyond the galaxy, above Dathomir. What made the Chimaera stand out was the stylized image of a chimaera that was etched onto the lower side of its hull.
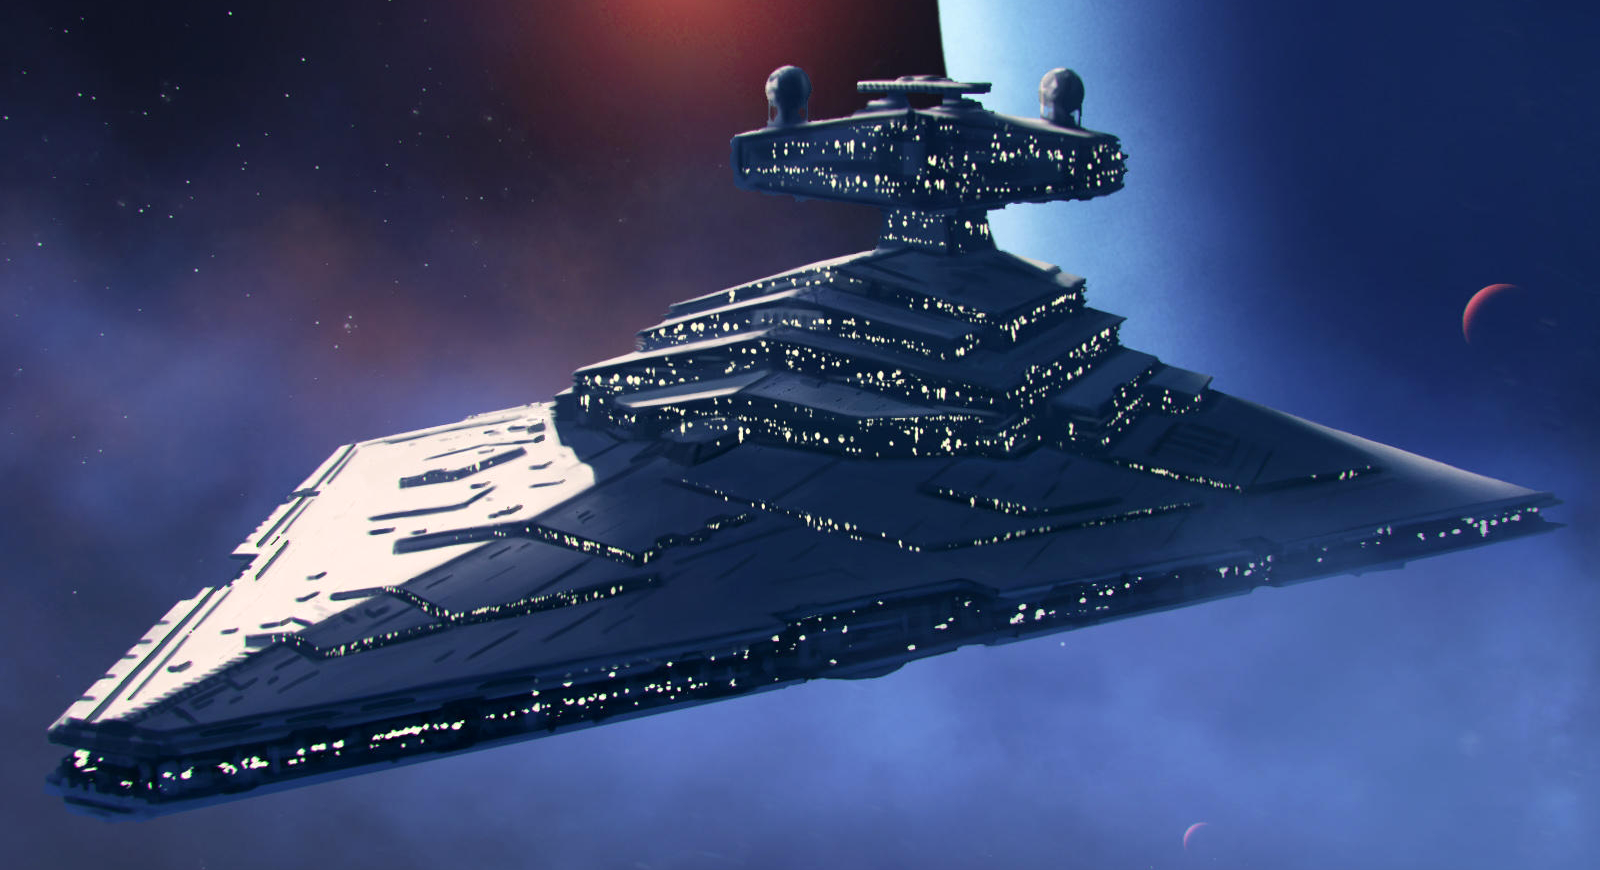
The Chimaera, an Imperial I-class Star Destroyer that had been modified, possessed several design variations compared to standard _Imperial I_s. A prominent feature was the large engraving of a chimaera on the ventral side of its hull. Thrawn's initial encounter with the artistic representation of chimaeras occurred during his time as a Senior Captain within the Chiss Expansionary Defense Fleet, when he met Uingali foar Marocsaa, an official from the Paccosh. Uingali, fearing the extinction of his species at the hands of the Nikardun, entrusted Thrawn with a double-ring of a chimaera, a cherished family treasure of the Marocsaa subclan.
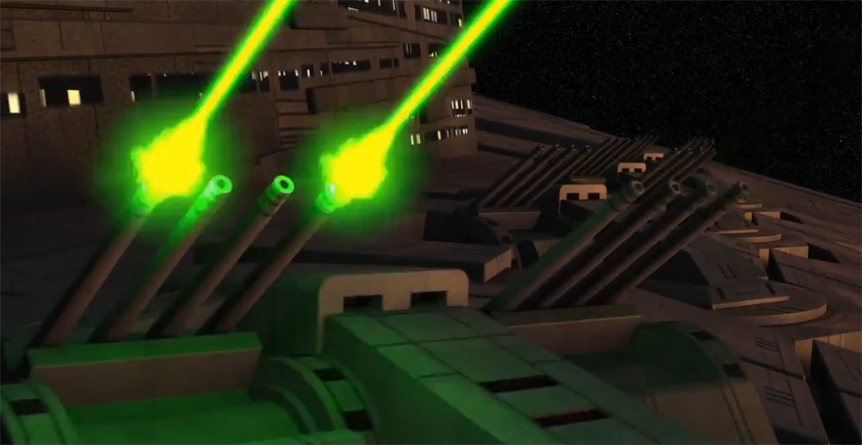
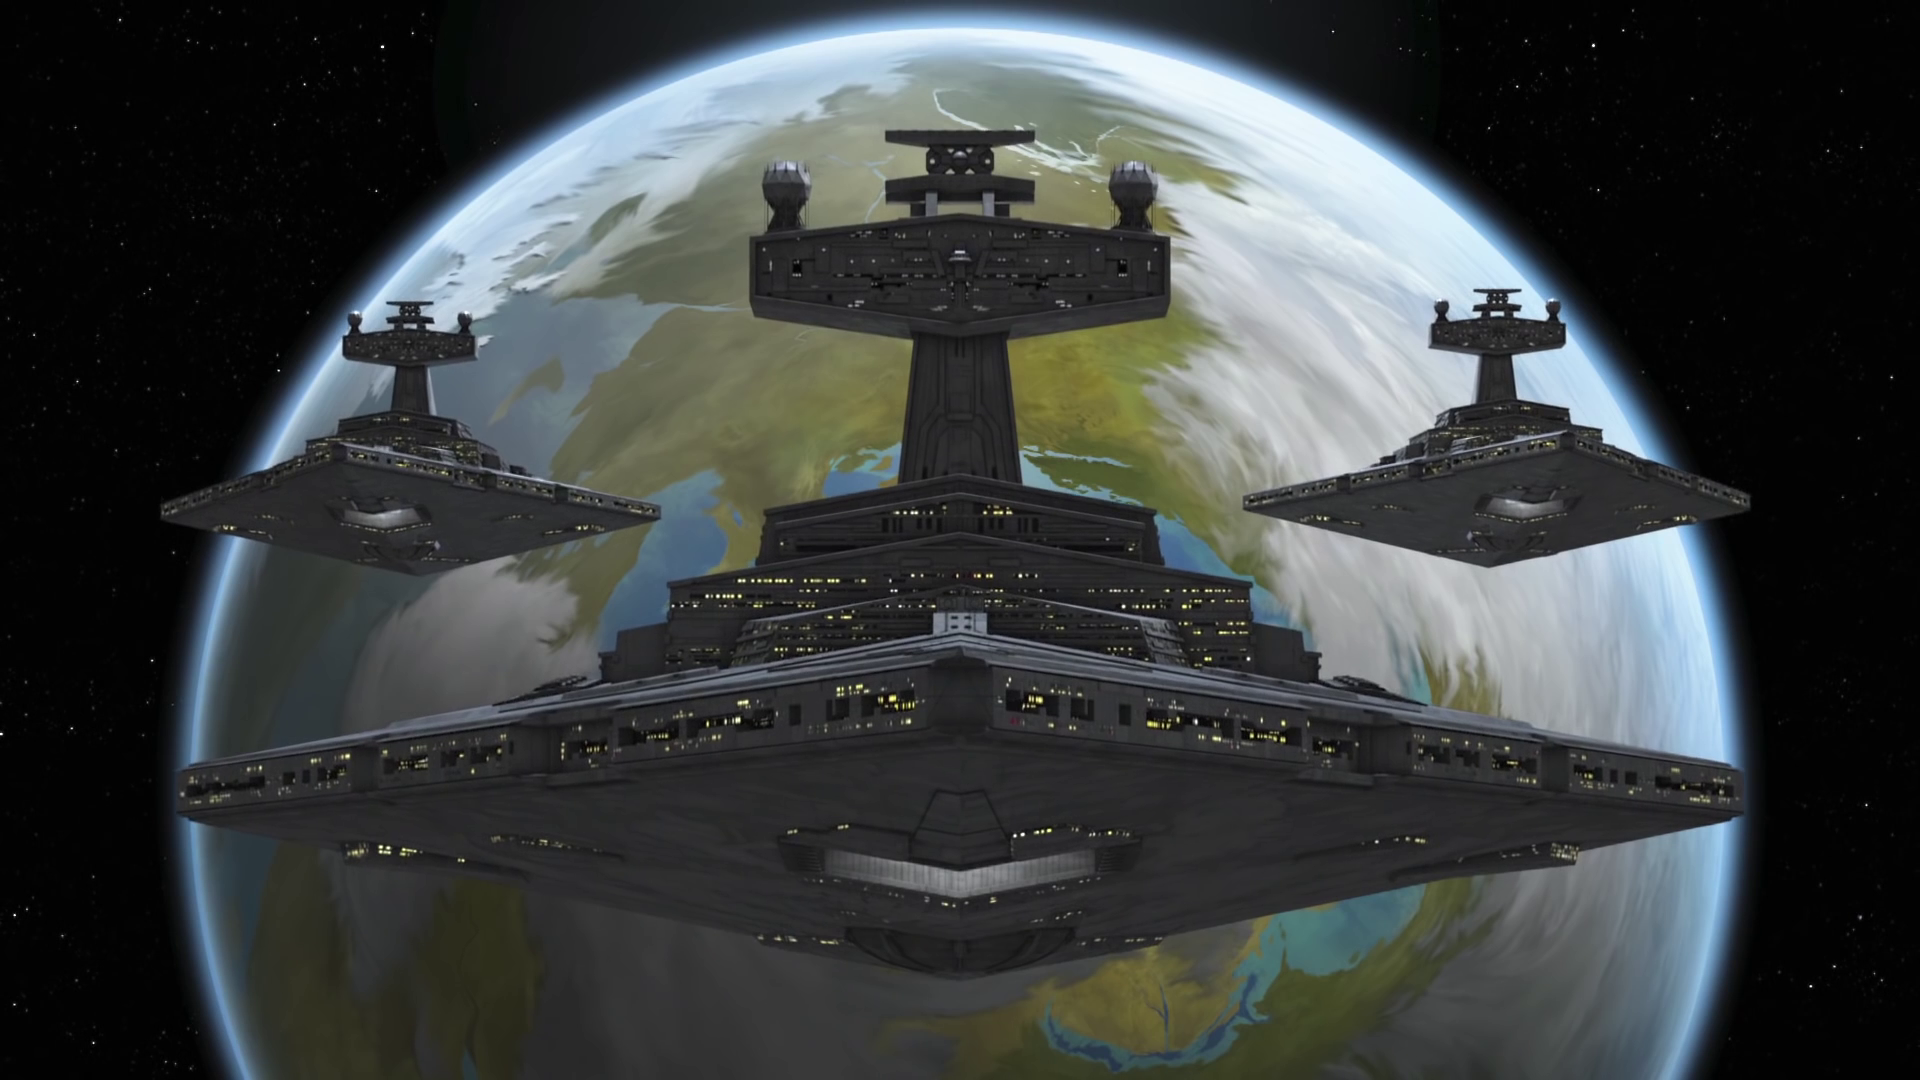
Another distinguishing characteristic was the presence of eight turbolasers surrounding the Chimaera's conning tower. In contrast to some _Imperial I_s equipped with large double-barreled turrets, the Star Destroyers of the Seventh Fleet featured eight-barreled turrets. Furthermore, the Chimaera had two opposing hangar bays, positioned at opposite ends of its ventral docking bay, a departure from the design of certain other Imperial I-class vessels. When not in operation, a sizable door could cover the aft bay.
The Chimaera, an Imperial I-class Star Destroyer, saw action during the reign of the Galactic Empire. As the seeds of rebellion began to take root across the galaxy, the ship was placed under the direction of Thrawn, a Chiss officer, upon his promotion to commodore by Grand Moff Wilhuff Tarkin, the governor of the Outer Rim Territories. Tasked with suppressing early rebel activity, the vessel, with Thrawn at the helm, had Lieutenant Commander [Karyn Faro](/article/karyn_faro], his protege, as the Chiss' first officer.
Thrawn commanded the vessel for a time, employing his effective strategies to counter the Empire's adversaries. Among the rebel factions gaining traction was one led by a mastermind known as "Nightswan." Despite never having formally met, Nightswan had been Thrawn's personal adversary for a number of years. The Chimaera was instructed to assist the recently attacked transport vessel Sempre, an assault Thrawn attributed to Nightswan's forces, theorizing it was carried out by the stolen frigate Castilus. To ensure preparedness upon arrival, Thrawn directed Faro to assess the Chimaera's weaponry and engines.
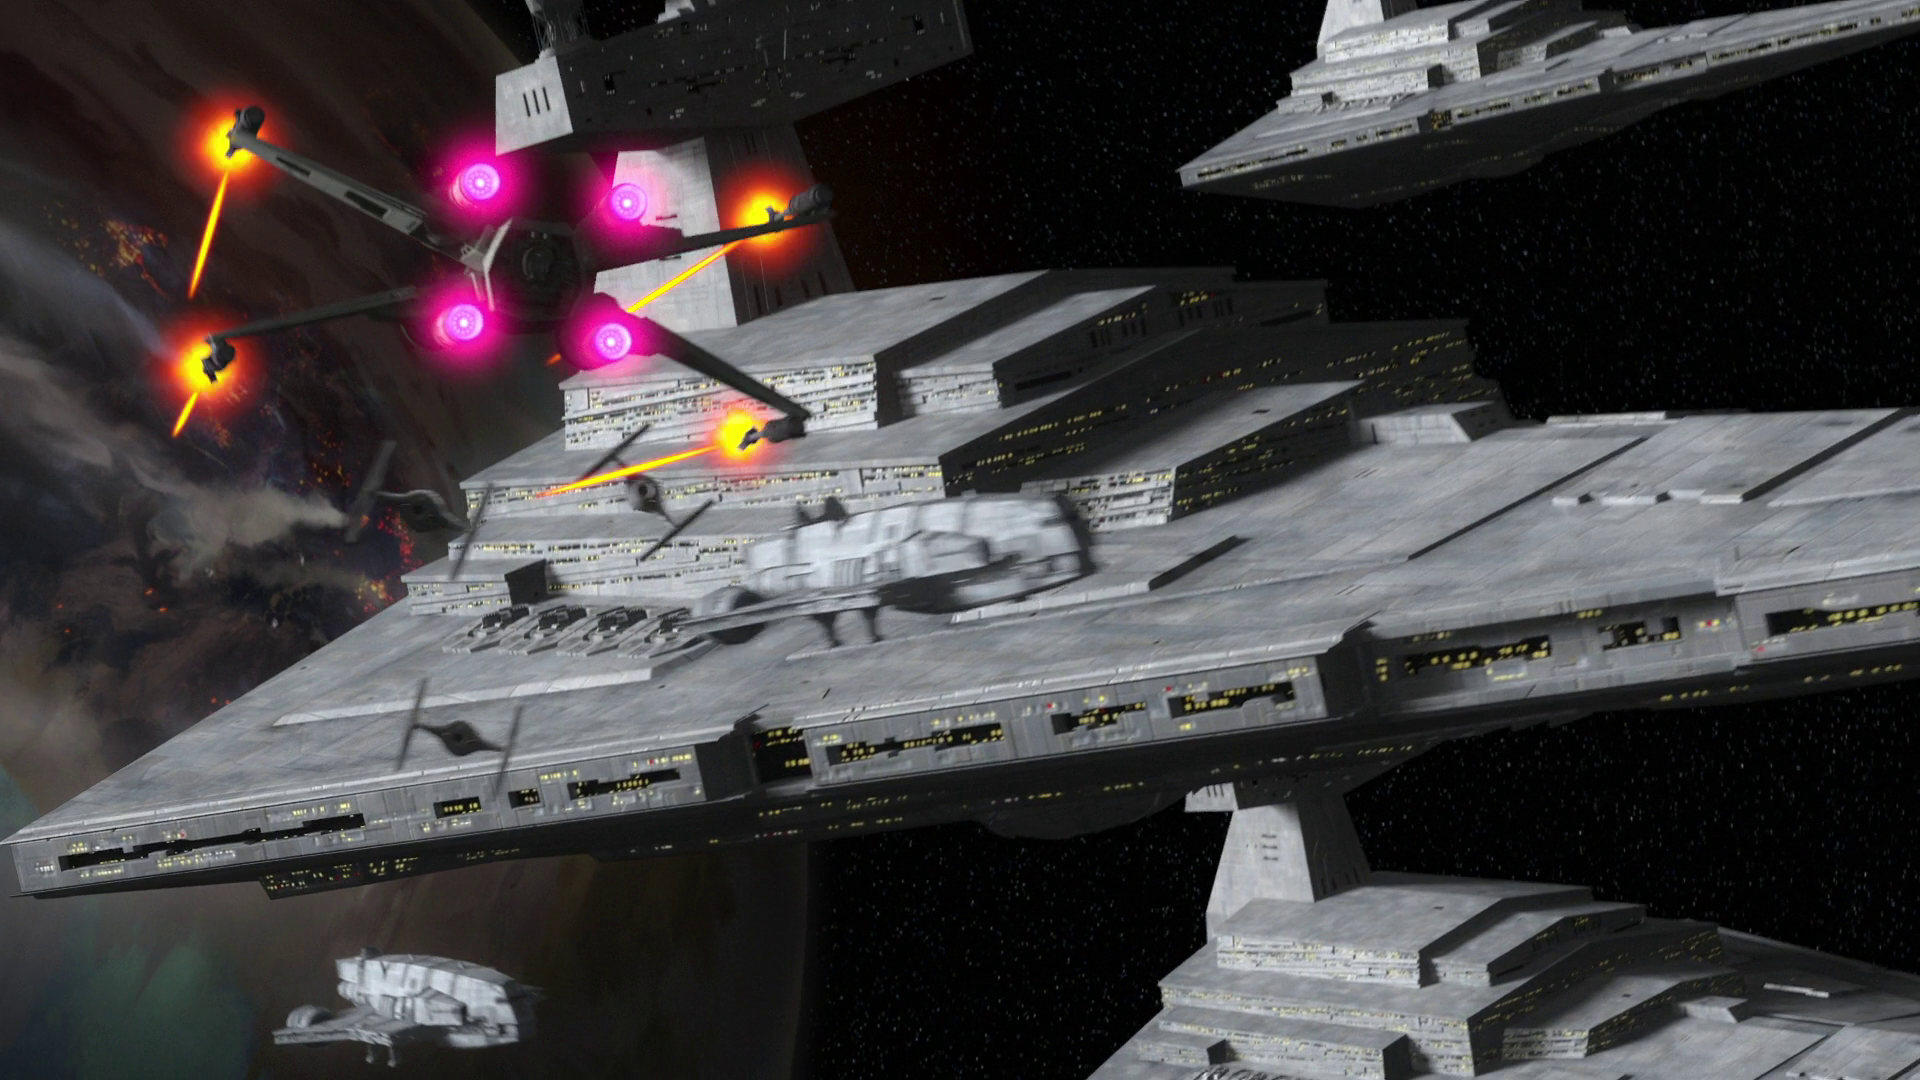
The Chimaera's arrival at the Sempre was too late, discovering it adrift with its crew killed. Thrawn deduced that the Sempre had been transporting Wookiee slaves who were subsequently rescued by rebels. In an effort to neutralize the terrorists believed to be behind the attack, the Chimaera proceeded to the space station Lansend Twenty-Six, an Imperial slave processing center and former Separatist fortress. By the time the Chimaera arrived, the station was under attack, spearheaded by the Castilus. Colonel Zenoc, the station's commander, lacked the necessary forces to defend against the insurgents. The arrival of the Chimaera shifted the battle's momentum. The Chimaera's TIE fighter escort engaged the Castilus and its contingent of V-19 Torrent starfighters, while the Star Destroyer targeted the Imperial space station, focusing its batteries on areas occupied by attackers and escaped slaves. After eliminating the threats within the fortress, the Chimaera turned its attention to the Castilus, neutralizing the frigate and securing victory.
Under Thrawn's leadership, the Chimaera continued to address insurgent threats. Several years before the Galactic Civil War, it was deployed to the Belsmuth sector, where Governor Quesl of Botajef had declared his planet's independence from the Empire. Quesl denounced the Galactic Empire as tyrannical, oppressive, and illegitimate, echoing sentiments that would later be articulated in the Declaration of Rebellion.
The Chimaera met with Fleet Admiral Jok Donassius, who required assistance in reclaiming Botajef for the Empire. Upon arriving in the Belsmuth sector, the Chimaera initiated strikes against the Botajef revolutionaries. Given the strength of the planetary defenses, a single Star Destroyer was insufficient to subdue the world. Fighter squadrons under the command of Senior Lieutenant Yve, the Starfighter Commander, conducted fly-bys past the two Botajef Defense Force CR90 corvettes that orbited the planet. The Imperials were informed that they were encroaching on the sovereign territory of the Jefi, a species native to Botajef.
Shortly thereafter, the Chimaera commenced its assault. Employing its tractor beams, the Chimaera subdued one of the corvettes, crewed entirely by Jefi. Meanwhile, the Chimaera's TIEs swiftly dealt with the planetary turbolasers. After concentrating firepower on various planetary targets, the defense emplacements were effectively neutralized. With the planetary forces in disarray, the Chimaera shifted its focus to capturing the second corvette, manned by humans. Thrawn had deduced that Governor Quesl's ostensibly righteous and revolutionary rhetoric about justice and self-determination was a facade for stealing Botajef's valuable artwork, and that the Governor would not entrust his life to the Jefi. Following the capture of his CR90 corvette, Quesl surrendered and agreed to return to Coruscant to face trial for treason.
Due to his accomplishments, Thrawn was elevated to the rank of admiral and given command of the 96th Task Force. The Chimaera remained under his command, serving as his command ship. Command of the vessel was entrusted to Commander Faro, who had been newly promoted, with Commander Eli Vanto, another of his proteges, serving as another of the ship's commanding officers. The Chimaera and the Ninety-Sixth were dispatched to the planet Batonn to address a faction of insurgents amid a growing uprising in the sector. However, at the last minute, the Chimaera and the Ninety-Sixth were recalled after Thrawn refused to launch an immediate attack against the rebels on Scrim Island.
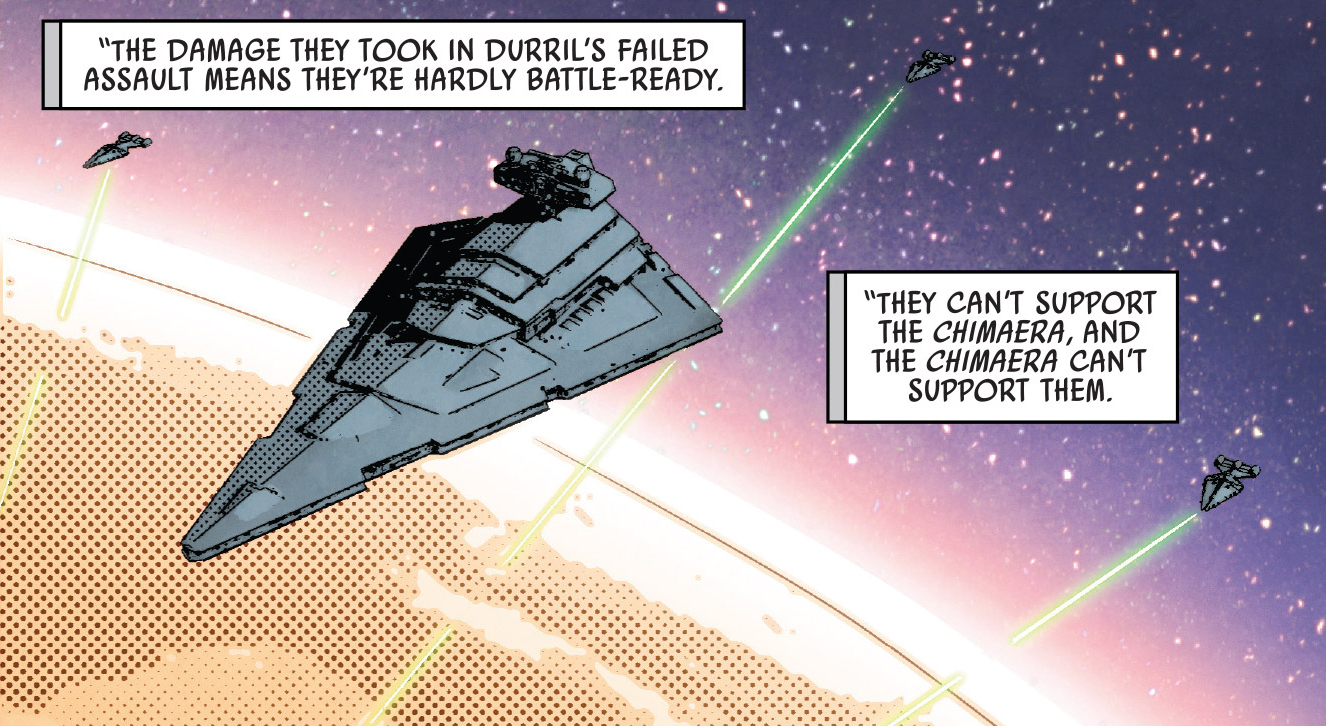
The Chimaera and the other ships of the Ninety-Sixth were rerouted to Sammun to quell the [rebellion](/article/sammun_insurgents] on that planet. The Empire achieved victory on Sammun, with the rebels surrendering after two of their ships were destroyed and another four were captured. Following the battle, the Chimaera returned to Batonn to support Admiral Durril and the One Oh Third Task Force, which was in complete disarray. However, rather than assisting the fractured Imperial fleet, which was being battered by the planetary defenses, the Chimaera maintained a safe distance. Upon returning to Batonn, Thrawn sent Vanto to confront Nightswan, who was revealed to be Nevil Cygni, a former military contracting consultant who used his resources to support a growing rebellion.
Thrawn and Vanto eventually returned to the Chimaera, which was then tasked with destroying the rebel base on Scrim Island. Instead of directly targeting the fortress, the Chimaera fired its ion cannons into the oceans surrounding the island, triggering a tsunami. Thrawn and Vanto once again went to the surface to meet with high command. In the meantime, Commander Faro was given full control of the Chimaera and the Ninety-Sixth Task Force, remaining in command of both the vessel and the fleet during the Battle of Batonn. Shortly thereafter, most planetary forces and rebel ships in orbit were destroyed. The remnants of Nightswan's force retreated to Paeragosto City, taking refuge in the Creekpath Mining and Refining complex. The Chimaera was unable to bombard the facility without destroying the entire city, so the capital ship remained in high orbit, awaiting further instructions.
Thrawn, holding considerable respect for his adversary Cygni, met the insurgent leader in secret to understand his reasons for opposing the Empire. Believing his adversary could be of great value to his people, Thrawn offered Nightswan a position within his native Chiss Ascendancy. Nightswan declined the offer, stating that his people were here, and understanding that he would die on Batonn for his convictions.
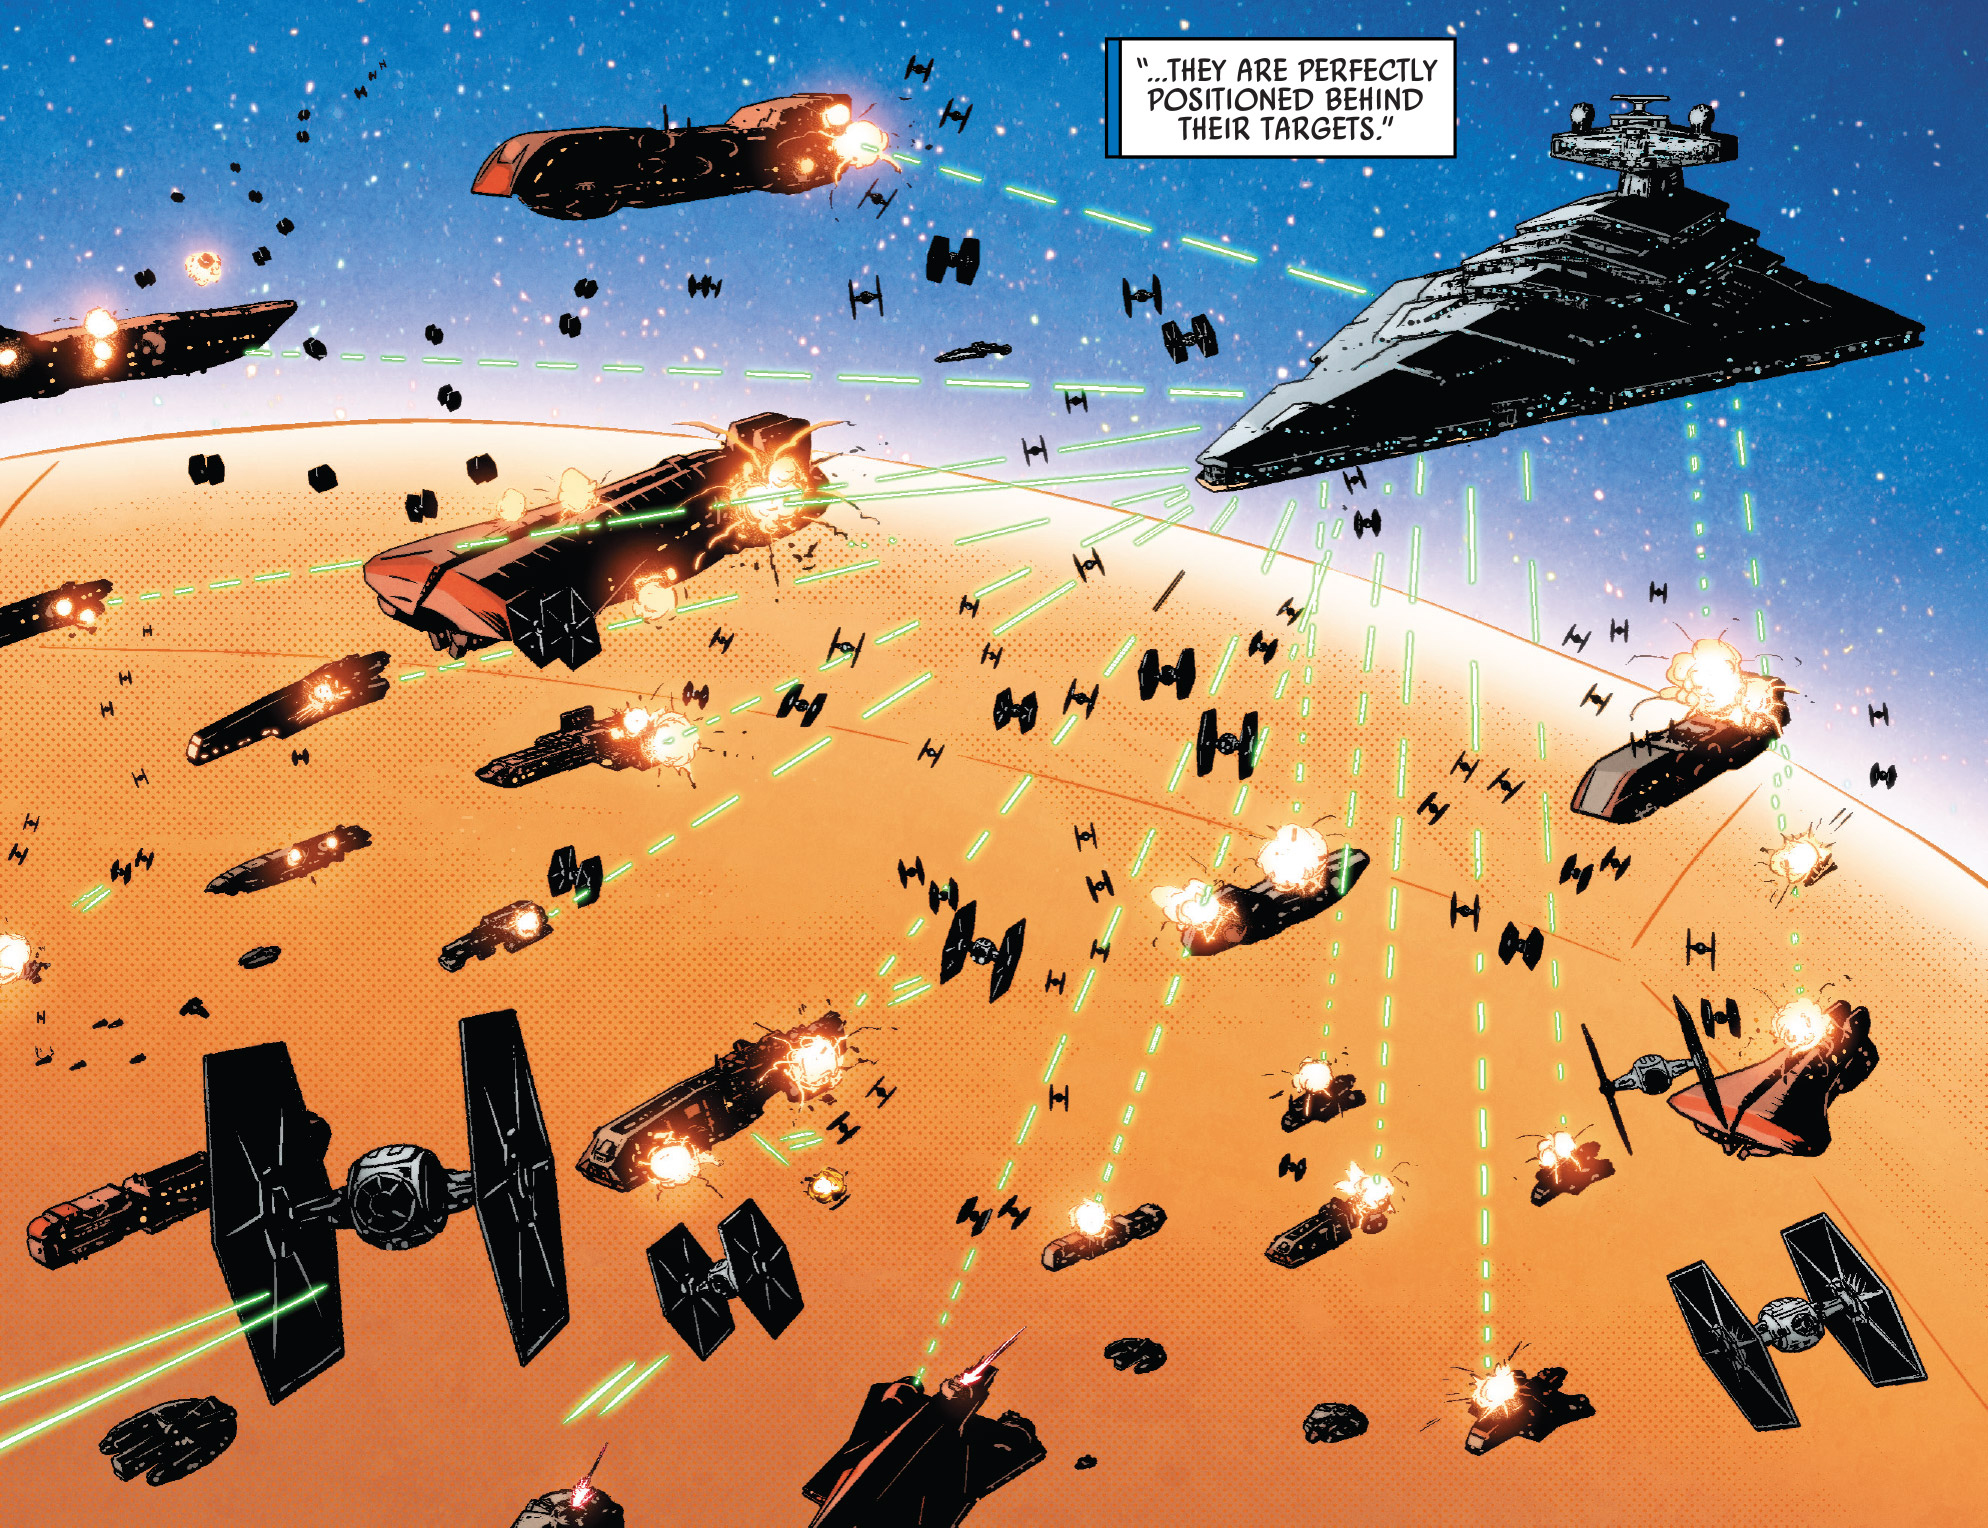
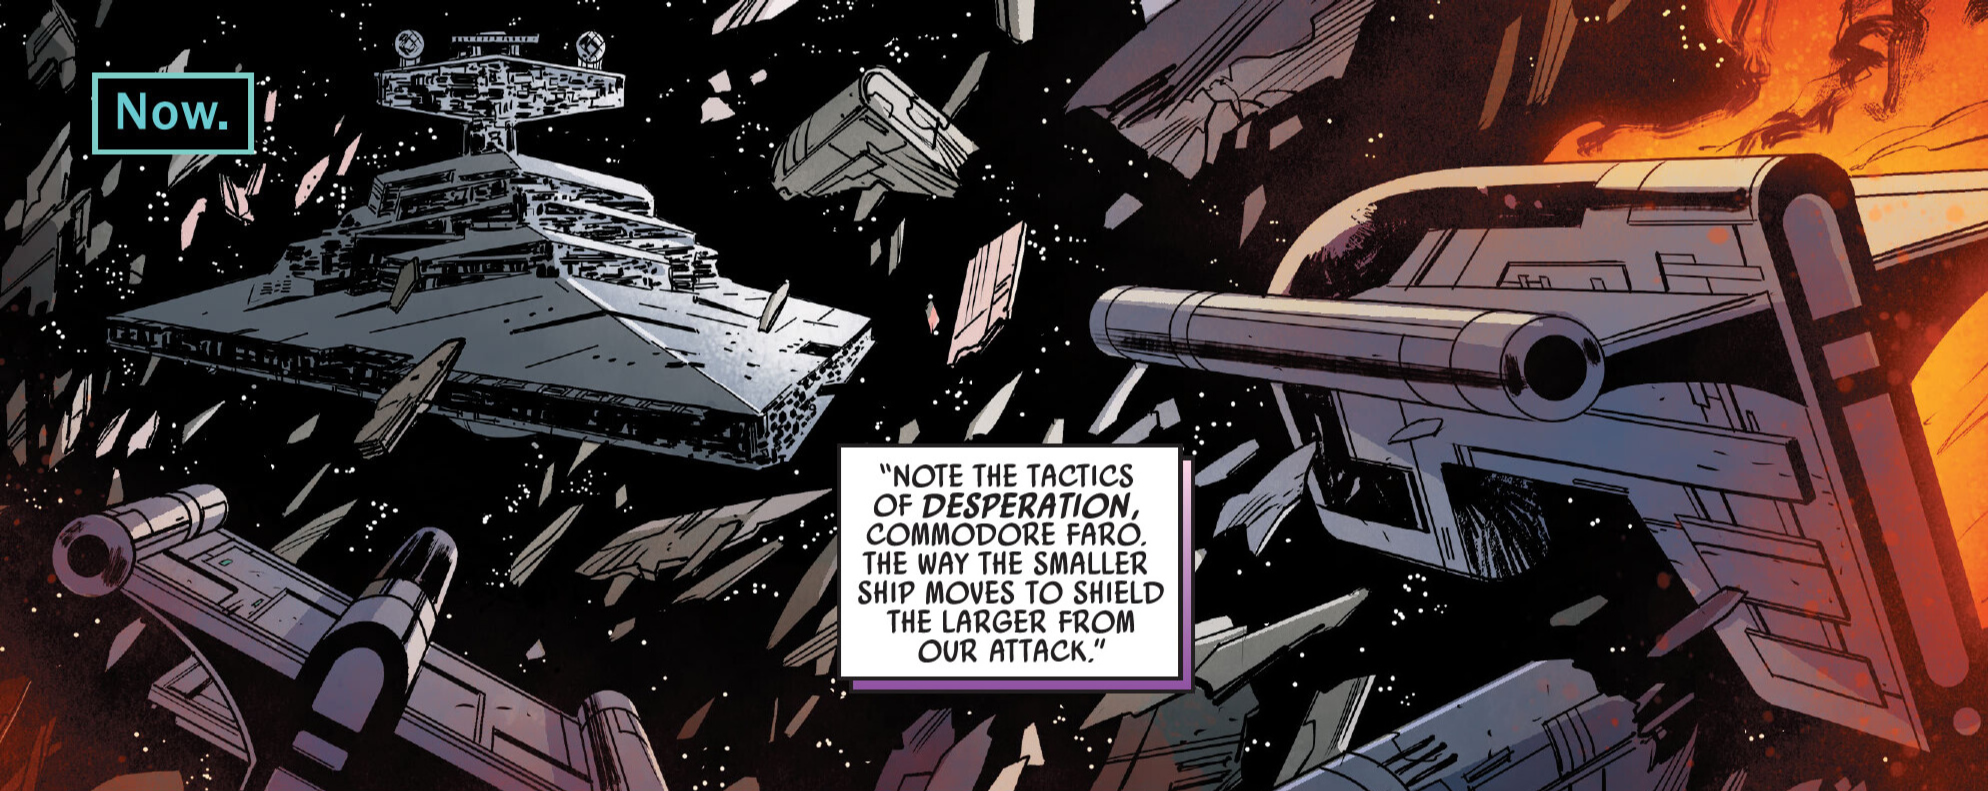
After meeting Cygni in person, Thrawn returned to the Chimaera and reassumed command of his ship. Shortly after, a fleet of thirty rebel starships emerged from hyperspace, surrounding the Chimaera in the conflict. While commandeered light cruisers shielded the Star Destroyer from the brunt of the fleet's fire, the Chimaera remained exposed. It positioned itself behind the cruisers, which served as bait to draw the majority of the enemy's fire. TIE fighter squadrons were then deployed to harass the fleet, while the Chimaera focused all its fire on the ships. The insurgency on the surface was crushed after an explosion destroyed all remaining rebel forces in the mines, as well as many civilians and Imperial personnel. Unbeknownst to almost everyone, the explosion was secretly orchestrated by Thrawn's friend Arihnda Pryce, the acting ruler and governor of her homeworld Lothal. Weakened by the Chimaera's fire and disheartened by the news of Nightswan's death and the defeat of the planetary insurgents, the remnants of the insurgent fleet retreated, securing a strategic victory for the Ninety-Sixth Task Force.
Following the victory at Batonn, Thrawn was commended for what were perceived to be his actions. Despite sharply disapproving of the unnecessary loss of civilian lives, his career advanced due to the eradication of the rebels and the pacification of the sector. As a reward for his years of service, Thrawn was promoted to the prestigious rank of Grand Admiral by Emperor Palpatine and placed in command of the 7th Fleet at the recommendation of Governor Pryce since Fleet Admiral Sartan was getting replaced. The Chimaera transferred with Thrawn, becoming the flagship of the 7th Fleet.
In 2 BBY, Governor Pryce lacked the resources to address a growing rebel threat in her sector and correctly suspected their affiliation with a galaxy-wide rebel movement. Believing Admiral Kassius Konstantine, the current chief Imperial military officer stationed in Lothal, was largely incompetent and more of a politician than a soldier, Pryce petitioned Grand Moff Tarkin for professional assistance to eliminate the rebels from her friend and the 7th Fleet and to strengthen the Empire's control over her sector, a request Tarkin granted.
Upon learning that the Lothal insurgents were headed to Mykapo to extract rebel sympathizers, Thrawn dispatched Konstantine with a single Arquitens-class command cruiser to halt the operation. The Chimaera traveled to the system to reinforce the defeated officer, although the rebels managed to escape the battle.
Thrawn continued his pursuit of the Lothal rebels, deploying Imperial E-XD-series infiltrator droids to secretly land on various worlds in search of their hidden base. EXD-9, one of the droids, landed on Chopper Base and began its infiltration of the facility, but was compromised when Fulcrum alerted the rebels to the infiltration. After a skirmish with Captain Garazeb Orrelios, the droid was ultimately powered down; however, it was programmed to self-destruct if powered down while in combat mode. Orrelios and the droids C1-10P and AP-5 managed to disrupt the program long enough to send the unit back to the Imperial fleet and detonate its proton warhead. After Imperial engineers discovered its return and reactivated it, the droid self-destructed, destroying the Imperial Star Destroyer it docked with. The Chimaera was present, leading ISB Agent Alexsandr Kallus to board the ship and inform the Grand Admiral. Thrawn remained relatively unconcerned, as the sabotage narrowed his search for the rebel base from a thousand systems to just ninety-four.
As the 7th Fleet continued to blockade Lothal, Thrawn requested that many officers who had encountered the Spectres visit the Chimaera. These included Lieutenant Yogar Lyste, Kallus, Konstantine, Pryce, sector command staff Captain Slavin, Commander Brom Titus, and Captain Brunson. Lyste had recently captured a disguised Ezra Bridger, who sought to rescue Kallus, who was secretly Fulcrum. Bridger was brought aboard the Chimaera. While Bridger was confined in Detention Block B7, Thrawn, Konstantine, Kallus's mentor and Thrawn's old friend ISB Colonel Wullf Yularen, Kallus, and Lyste convened in Thrawn's Office. There, the Grand Admiral informed them of a rebel spy threat, suggesting one of them was likely a traitor. Later, Kallus made his way to the Detention Block to free Bridger, using Lyste's code cylinder. They then proceeded to Thrawn's office to erase information about the Rebels' base from his database, while also obtaining clearance codes for the retrieval team to land and extract them.
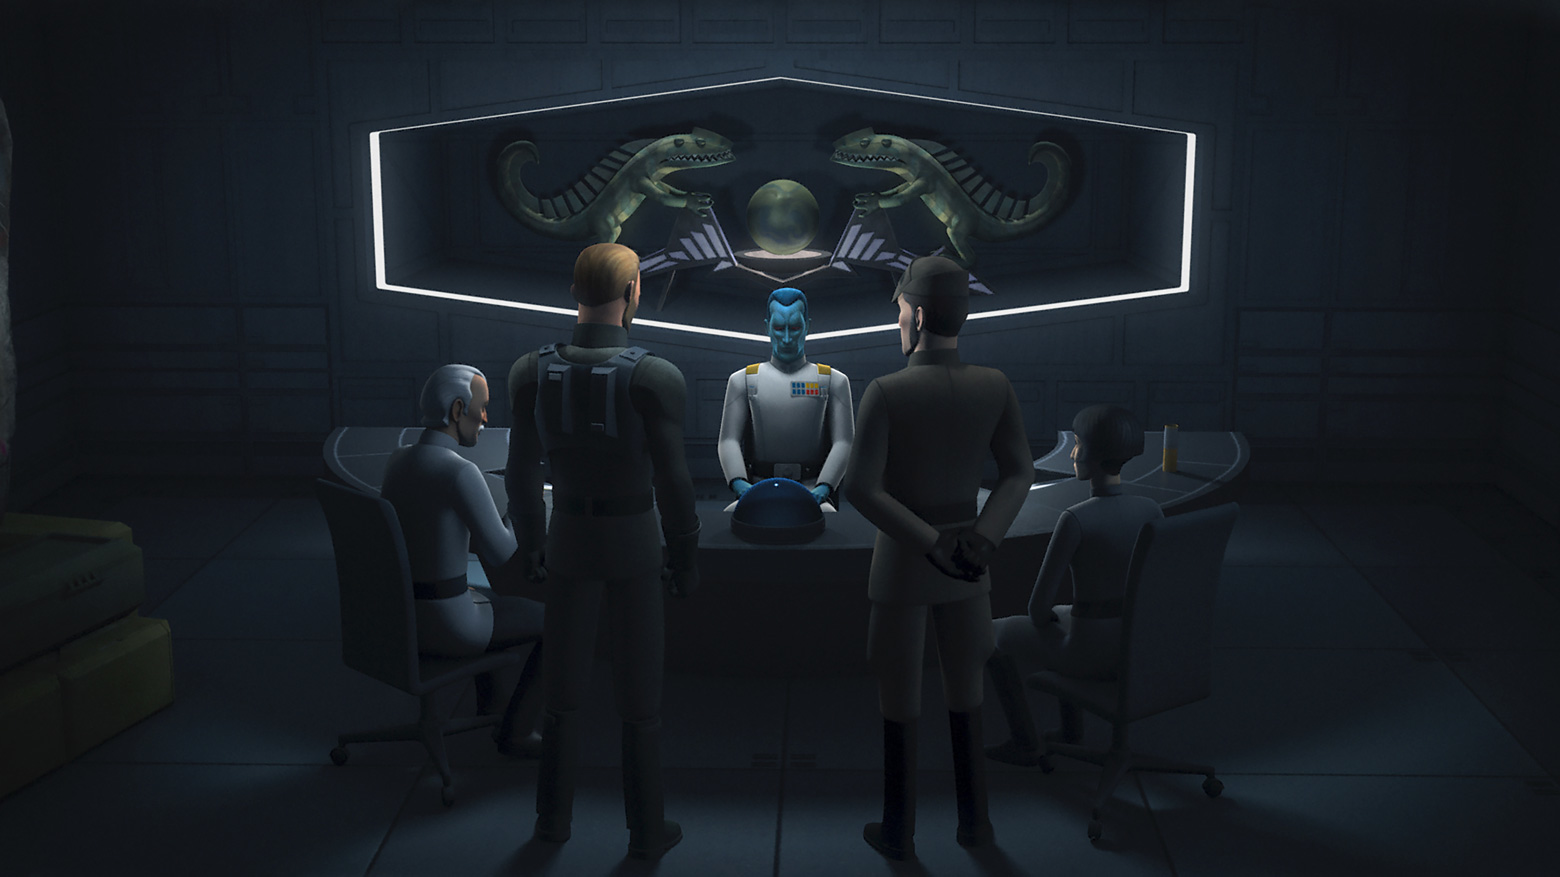
Thrawn noticed the prisoner's escape and returned to his office to investigate any tampering. Kallus, Chopper, and Ezra concealed themselves while he inspected his office, with Kallus reprogramming Thrawn's sentry droids in the adjacent gym to attack the Chiss. However, the Grand Admiral, a skilled martial artist, ultimately disabled them. Bridger's Master Jedi Knight Kanan Jarrus and Captain Rex landed on the ship with a Sentinel-class landing craft, attempting to extract Bridger and Kallus using stormtrooper armor as cover. However, Pryce confronted the intruders and attempted to shoot them. Mistaking Pryce for the traitor, Lyste stunned her with his blaster, erroneously believing her to be the traitor. This chaos allowed the Rebels to escape and provided Kallus with an alibi, as he had successfully framed Lyste as the traitor. Kallus thus chose to remain on the Chimaera to continue his role as Fulcrum. However, Yularen and Thrawn later discussed the incident's outcome, dissatisfied with the results. They both concluded that Lyste was too loyal to be capable of treason, correctly deducing that Kallus was the only possible traitor.

After further investigation, Thrawn located the rebel hideout on the planet Atollon. As Phoenix Cell prepared to launch a surprise Attack on Lothal with the intention of destroying the Imperial Armory Complex, they received a transmission from Kallus that Thrawn knew, delaying the Attack. Recognizing Kallus's actions, Thrawn saw an opportunity to apprehend the double agent, subduing him after a brief struggle. From aboard the Chimaera, Thrawn mobilized a portion of the 7th Fleet and set course for Atollon.
With little time to prepare, the rebels found themselves outgunned and outmatched by the 7th Fleet, commanded by Thrawn and Pryce on the Chimaera. The rebels proved no match for the fleet, which managed to destroy the forces of General Jan Dodonna in the early stages of the Battle of Atollon. To compound matters, the fractured rebel fleet was unable to jump to lightspeed due to an active Interdictor vessel captained by Konstantine. Defying Thrawn's orders, Admiral Konstantine broke formation to engage the rebel flagship Phoenix Nest, commanded by Commander Jun Sato. Sato evacuated his ship and crashed it into Konstantine's, killing both men and destroying both vessels. The destruction of the interdictor provided Lieutenant Commander Bridger with the opportunity to seek reinforcements before Thrawn could order the activation of the second interdictor.

The rebel squadron was utterly destroyed by the Chimaera and the rest of the 7th Fleet, forcing the surviving ships to retreat to the planet's surface. The rebels activated the base's shields just in the nick of time, but Thrawn, seeking to intimidate them, directed the Chimaera's turbolasers to bombard the ground. Once Thrawn felt the rebels were sufficiently demoralized, he launched a ground invasion force consisting of Imperial walkers and a substantial contingent of infantry. He descended to the surface accompanied by his newly appointed guard squadron of death troopers, a special unit assigned to him by the Emperor. Thrawn temporarily transferred command of the Chimaera to Pryce, who then oversaw the fleet's actions from orbit.
As Thrawn spearheaded the ground assault, the Chimaera and the rest of the Imperial fleet encountered an unexpected arrival: Bridger leading a small force of Mandalorians. This third party successfully disabled the second Interdictor ship, which allowed the remaining rebel ships to escape. Aboard the Chimaera, Pryce ordered Agent Kallus to be executed by ejecting him from the ship's airlock. However, Kallus, displaying remarkable skill, managed to subdue two stormtroopers within an elevator and discreetly made his way to the ship's escape pods. He was rescued by the rebels before they jumped into hyperspace.
Following Thrawn's less than complete triumph at Atollon, the Chimaera was assigned the task of suppressing a threat to shipping in Sector 56, part of a broader initiative to bring a specific star system under Imperial dominion. This confrontation culminated in a truce that effectively neutralized the shipping threat, resulting in the system's incorporation into the Empire.
After this engagement, Thrawn and the Chimaera returned to Coruscant. Despite receiving news of his less-than-perfect victory, Emperor Palpatine allowed him to retain command of the 7th Fleet, understanding that factors beyond the Grand Admiral's control were responsible for the setback. However, Palpatine's apprentice, Sith Lord Darth Vader, a long-time acquaintance of Thrawn, did not share his Master's leniency. Consequently, Emperor Palpatine instructed Thrawn and Vader to take the Chimaera to the planet Batuu in order to investigate a recent disturbance in the Force that Palpatine had sensed. Simultaneously, Tarkin was dispatched with the 7th Fleet to pursue the Rebel Alliance. Thrawn and Vader also traveled to Mokivj to investigate another disturbance. Upon their visit, they realized the Grysks, the archenemy of Thrawn and the Chiss Ascendancy, threatened the security of the Empire. Thrawn, who studied their tactics and who pledged to fully protect the Ascendancy, whom the Grysks also were at odds with, bought the Empire time to prepare for their upcoming skirmish after the Chimaera, along with Vader and Thrawn's team of TIE Defender starfighters, attacked the Grysks. The Grysk forces dispatched were destroyed entirely, with a Chiss courier ship escaping the battle.
At a later time, the Chimaera and the 7th Fleet reappeared in orbit above Lothal. Shortly thereafter, under orders from Chancellor Mon Mothma, the Spectres returned to Lothal to assist the Lothal resistance group and to gather intelligence on Thrawn's TIE/D Defender Elite program. Following a successful operation on the planet's surface, Captain Hera Syndulla and her droid C1-10P attempted to flee the system in a UT-60D U-wing starfighter/support craft. Despite Thrawn's efforts to intercept the starfighter from the bridge of the Chimaera, the craft managed to escape by initiating a hyperspace jump through an Imperial construction module.
Shortly after, a squadron of over a dozen Rebel X-wing starfighters and a dozen Y-wing bombers arrived to commence the long-anticipated attack and destroy the Imperial Armory Complex. Engaging the Imperial blockade, the newly promoted General Syndulla skillfully lured Commander Vult Skerris into a position over the Chimaera. Thrawn cautioned Skerris to move away as he prepared the Chimaera to fire upon Syndulla, but Skerris, determined to eliminate his rival, refused. Thrawn initiated the barrage, and both fighters sustained heavy damage, losing their shielding. Syndulla then attacked Skerris's fighter, and he crashed into a cruiser, sending it hurling into a Star Destroyer. The remaining X-wings and all of the Y-wings then made for the surface. However, Thrawn prepared for such an event since he knew of Syndulla's skill and had a second swarm of TIE fighters in the atmosphere attack the X-wings and the Y-wings, all of which were destroyed. All of the pilots were captured or killed, excluding Captain Mart Mattin, who escaped with the help of the Lothal resistance group.
Shortly thereafter, Thrawn took the Chimaera to Coruscant when he was summoned to attend an important meeting with Emperor Palpatine that Governor Tarkin already arranged over the funding for his TIE Defender program because thanks to General Syndulla's bootless attack on Lothal, his rival Director Orson Callan Krennic of the Imperial Weapons Division was being quite persuasive to the ISB about diverting it to his own Project Stardust like Governor Tarkin did with all funding for the Imperial cloning program led by Chief Scientist Doctor Royce Hemlock of the Advanced Science Division after he died in 18 BBY, leaving the 7th Fleet to guard Lothal. In that time, the rebels rescued Syndulla, and after some fighting, AT-ATs destroyed the Lothal City fuel depot, halting production lines for TIE Defender. This affected Thrawn's plea for Palpatine to continue giving his support for the TIE Defender program, and he became apoplectic toward Governor Pryce for trying to cover it up with a parade to celebrate the death of Jarrus so as punishment for letting her ruthless and prideful behavior give their enemies a victory by completing their mission he marked her for death unless she captured the rebels by the time he returned.
Shortly after, the Rebels plotted to liberate Lothal from the Empire while Thrawn was absent dealing with the Grysks and the Skirmish against the Third Fleet. After ending the skirmish against the traitorous Grand Admiral Balanhai Savit, Thrawn sent Commodore Faro to Coruscant for her new orientation to lead the Eleventh Fleet when he and Captain Gilad Pellaeon returned to Lothal with the 7th Fleet and the Harbinger to end the insurgency on Lothal with one devastating blow. Knowing Thrawn would soon return, they acted quickly by setting a trap for Governor Pryce since she was still marked for death. Pryce fell prey to the trap and was captured, but Thrawn's original bodyguard and assassin the Noghri Rukh survived and sent word to Thrawn afterward. Thrawn soon arrived on the Chimaera to find that the rebels taken over the Imperial Complex and prepared it to launch into space. Thrawn contacted the Rebels, demanding their surrender, to which Bridger replied that they had all of the Imperial ground forces hostage. Thrawn dismissed it as the Rebels actually rescuing the Imperial forces from what he was about to do, and began a bombardment of Capital City. Bridger gave in and surrendered to Thrawn, taking himself to the Chimaera. While on board he met with an altered hologram of the Emperor, presenting as a kindly old man and offering to return Ezra's dead parents to him. The offer was a ploy meant to trick Bridger into opening the portal to the World Between Worlds and turn him to the dark side like he did with Vader. After contemplating the situation, Bridger escaped and made for the bridge to confront Thrawn.
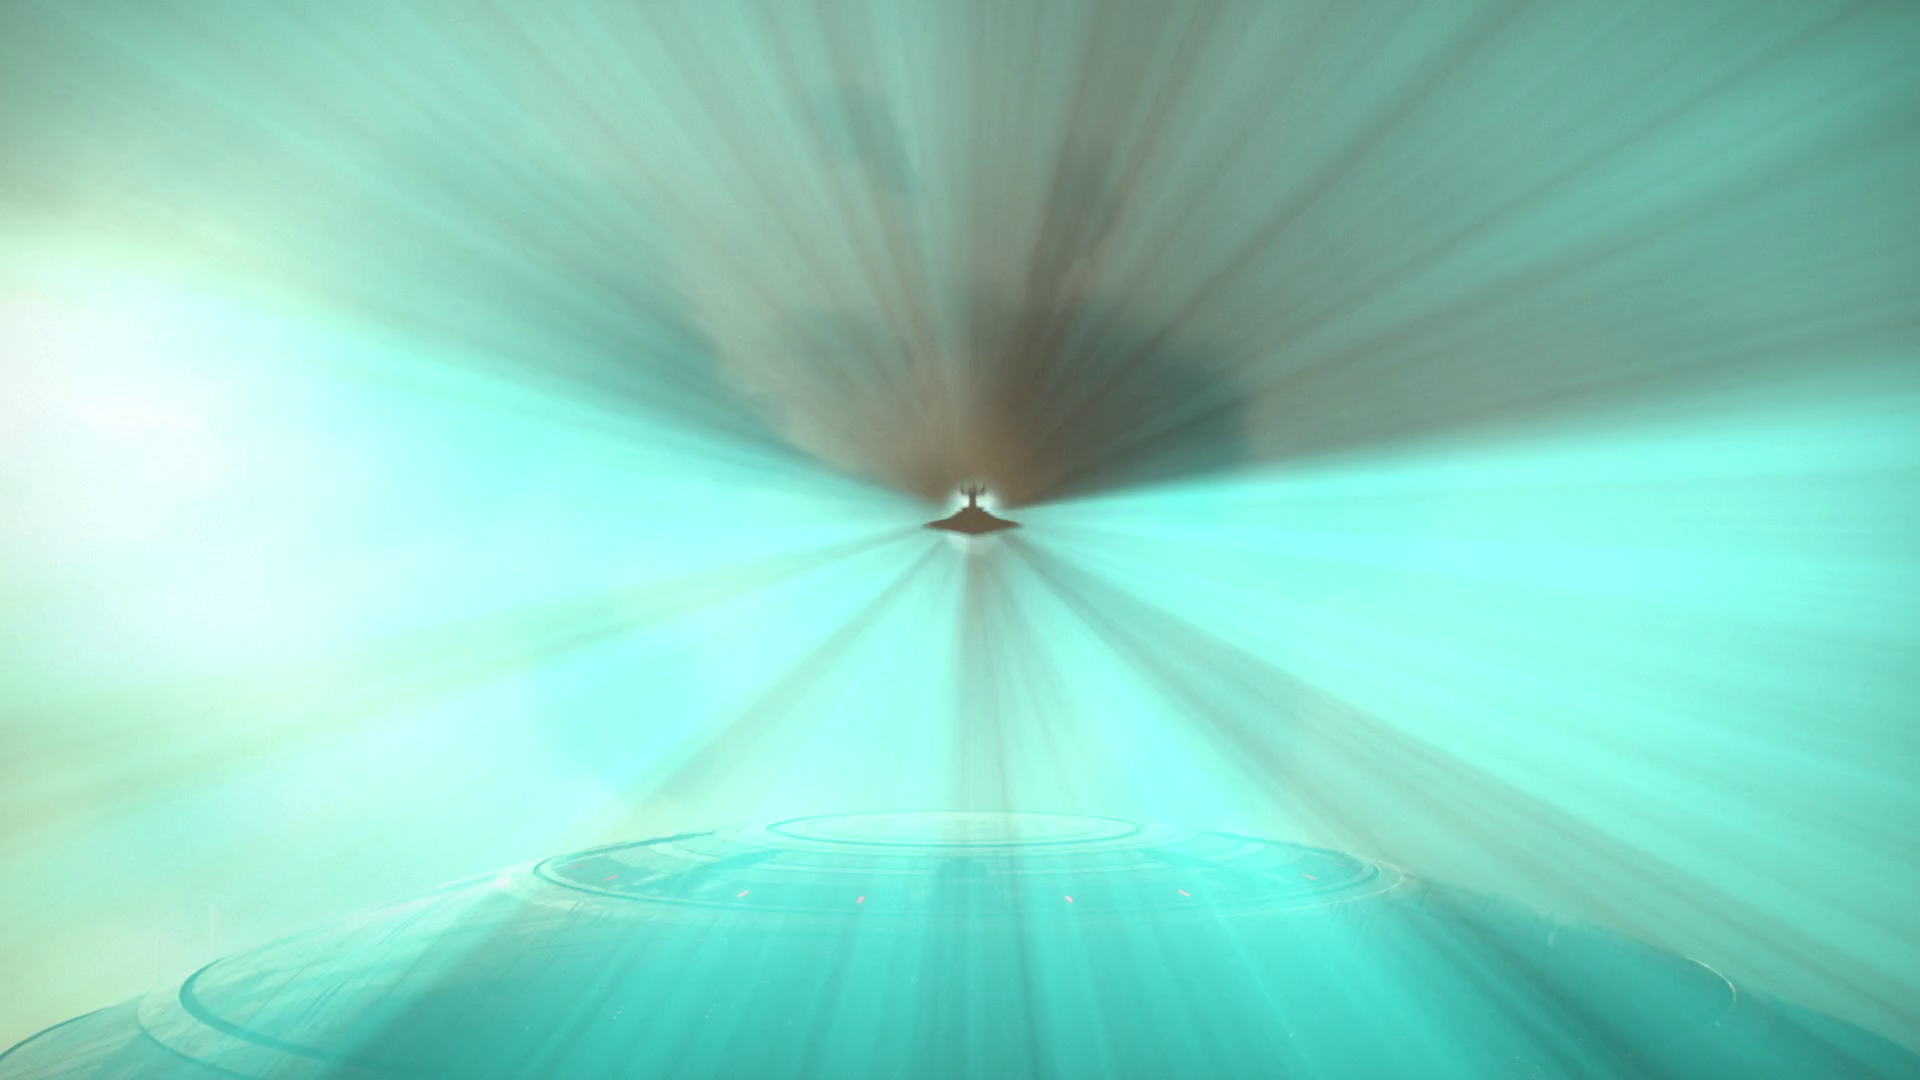
The remaining Rebels were successful in activating the Imperial Complex's shields, thereby safeguarding the city from further bombardment. Furthermore, several rebels, piloting the Ghost, circled the city while broadcasting on frequency zero in order to attract purrgil. Bridger reached the bridge of the Chimaera and confronted Thrawn just as the purrgil arrived, tearing through the blockade before attacking the Chimaera and its escorts. After destroying the other two Star Destroyers, some of the purrgil latched onto the Chimaera and dragged it into hyperspace, bringing the brief battle to an end. In the process, Bridger, Thrawn, and the entire crew of the Chimaera vanished. With the Chimaera gone, the Rebels launched and detonated the Imperial Complex, eliminating the last Imperial forces on Lothal and liberating the planet.
The Chimaera survived its intergalactic journey, carried by the purrgil along their ancient migration paths to Peridea, a world situated in a distant galaxy. The Star Destroyer arrived heavily damaged and crippled. It remained in forced isolation there until the arrival of Thrawn's former servant, Morgan Elsbeth. During this period, Thrawn initiated efforts to repair and rebuild the Chimaera. By approximately 9 ABY, the ship was operational, but in a severely degraded state. Large sections of the superstructure, particularly around the bridge and the right side, had lost their armored plating. A significant portion of the Star Destroyer's left side was torn away, and two of its three Destroyer-I Ion engines were heavily damaged. The Chimaera was kept aloft by its four Gemon-4 Ion engines which were still functioning.
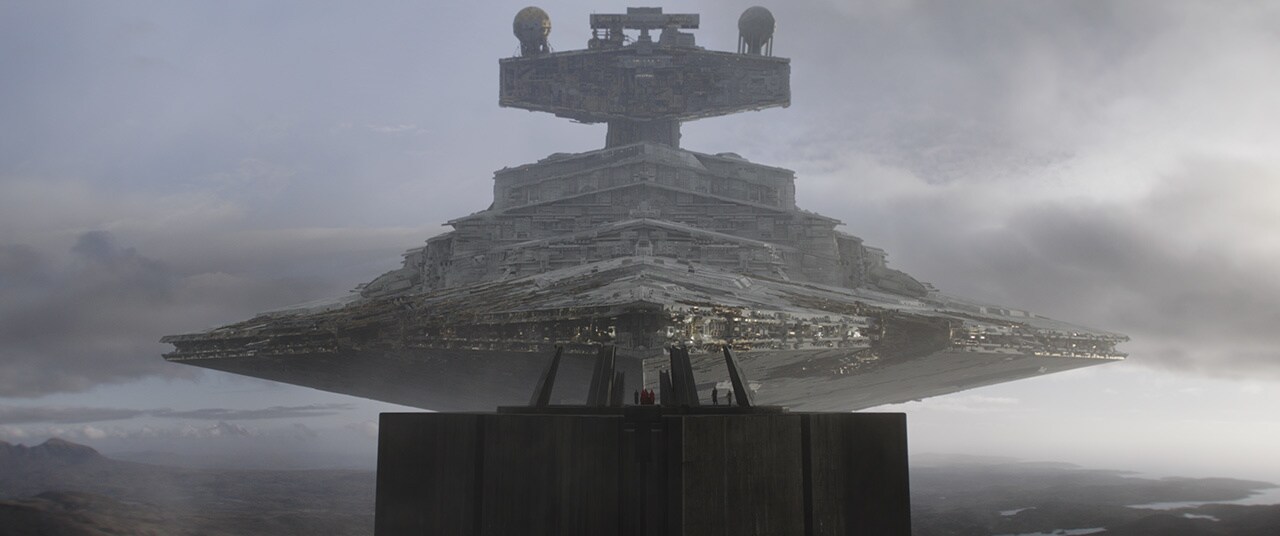
Upon Elsbeth's arrival to Peridea, the Chimaera was positioned above the Great Mothers' Fortress on the planet. A three rotation long cargo transfer from the Dathomiri catacombs to the ship began by Thrawn's Captain of the Guard Enoch, as per his agreement with the Great Mothers for contacting Elsbeth. The Chimaera remained in place until the cargo transfer was complete where the Eye of Sion descended from orbit around Peridea. The Chimaera docked within the giant hyperspace ring and escorted off of the world it was stranded on for so long.
Ahsoka Tano, Sabine Wren, and Bridger attempted to prevent the ship's departure, but were unsuccessful. Bridger made it aboard, while Tano and Wren raced to catch up as it rose above Peridea. The Eye of Sion blasted into hyperspace before the two could reach it, allowing Thrawn and Bridger to return to the galaxy. Having finally escaped from his exile, Thrawn had the Eye of Sion go to the late Elsbeth's homeworld Dathomir.
Many members of the Chimaera's crew displayed their loyalty to Thrawn by wearing a stylized chimaera symbol, either on their arms or pauldrons. Commander Karyn Faro served as the second-in-command aboard the Chimaera, assuming control of the ship in Thrawn's absence. Other officers who served on the Chimaera included:
- Major Carvia , stormtrooper officer [8]
- Major Quach , Imperial Starfighter Corps officer [8]
- Commodore Hammerly , [11] chief sensor officer [8]
- Senior Lieutenant Lomar , [11] Senior communications officer [18]
- Senior Lieutenant Pyrondi , weapons officer [18]
- Senior Lieutenant Xoxtin , Chief Hangar Master [18]
- Lieutenant [8] Agral , helm officer [11]
- Commander Woldar [15]
Lieutenant Commander Eli Vanto, serving as Thrawn's aide, was typically stationed aboard the ship. The starship's bridge had its own dedicated officer corps.
Within the current canon continuity, the Chimaera made its debut in the 2016 Star Wars Rebels episode titled "Iron Squadron." The Chimaera was first identified in the 1991 Star Wars Legends novel Heir to the Empire by Timothy Zahn. It was later retconned within the Legends continuity to have appeared in Star Wars: Episode VI Return of the Jedi by Decipher's 2000 Star Wars Customizable Card Game – Death Star II Limited. However, this is impossible, since Rebels establishes that the Chimaera was exiled during the events of Return of the Jedi. In contrast to its depiction in Star Wars Rebels, the Legends version of the Chimaera was classified as an Imperial II-class star Destroyer. In Ahsoka and Thrawn: Alliances 1, the Chimaera is shown with a communications array atop its bridge tower, despite being depicted with a tractor beam targeting array during the events of Rebels which takes place before and after Thrawn: Alliances, and before Ahsoka.